Nearly complete
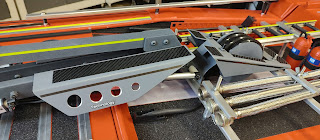
There has been loads of progress on the build as you can see from the pictures. I have started some weathering of the paint but this now needs to start fully. The belts on the 4WD system seem to be holding but if not I do have a plan B. I have added a few more lights but still have not got around to the red rear lights. The water pump system has had a major upgrade. I have moved from one to two pumps connected up in series. The system is switchable so I can either run a single or dual pump system. The pumps are connected in series each offering a 5l flow rate but combining them like this increase the head pressure and looks great. The lower sprinkler system infront of the front wheels is not working very well and I think if I want to keep this it will have to be powered from its own separate pump. I am having a syphoning issue which is taking power from the main lower nozzle pump.
The main thing that has been taking all my time if the foam system and I have still not got there.
By adding two mups in series I have significantly increased the head pressure which helps with the foaming. I think my issue is not the eductor where the foam and water is mixed, the foam mix coming out of the top nozzle foams up well when brushed away. This leads me to think that the foam/water mix is not getting enough air through aggitation. To solve this I have created new nozzels which help with this and do work, to a degree. The probelm is that they put loads of foam over the cab which I dont like. If I decide to keep the foam system then I will change to the lower nozzel and spray water from the top.
This way I can reduce the head pressure with the foam flow and it should look much better.
Lots more experimantation needed.
I am now running a full working GPS system and 5.8ghz camera systems and telemetry.
4WD belt system works well. Hub caps printed and fitted.
I have fitted smoke generator to simulate the exahust. I am not sure I will use this a great deal at events but it is in there and looks good at startup.
Rear lights still need fitting.
Dual pump system now on both sides, pumps running in series offering 5L/m flow rate. Max PSI on the system is 100psi.
The top nozzel can now send a stream of foam about 5m from the front of the cab and the same for the water stream from the lower nozzel. Flow rate looks about right at 5L/m
New seals on the doors keeps all the water out and work well.
Still need to do loads of work on the weathering and making it look good for the cameras.


